
ArchPOWER Linux for PPC64(/32)
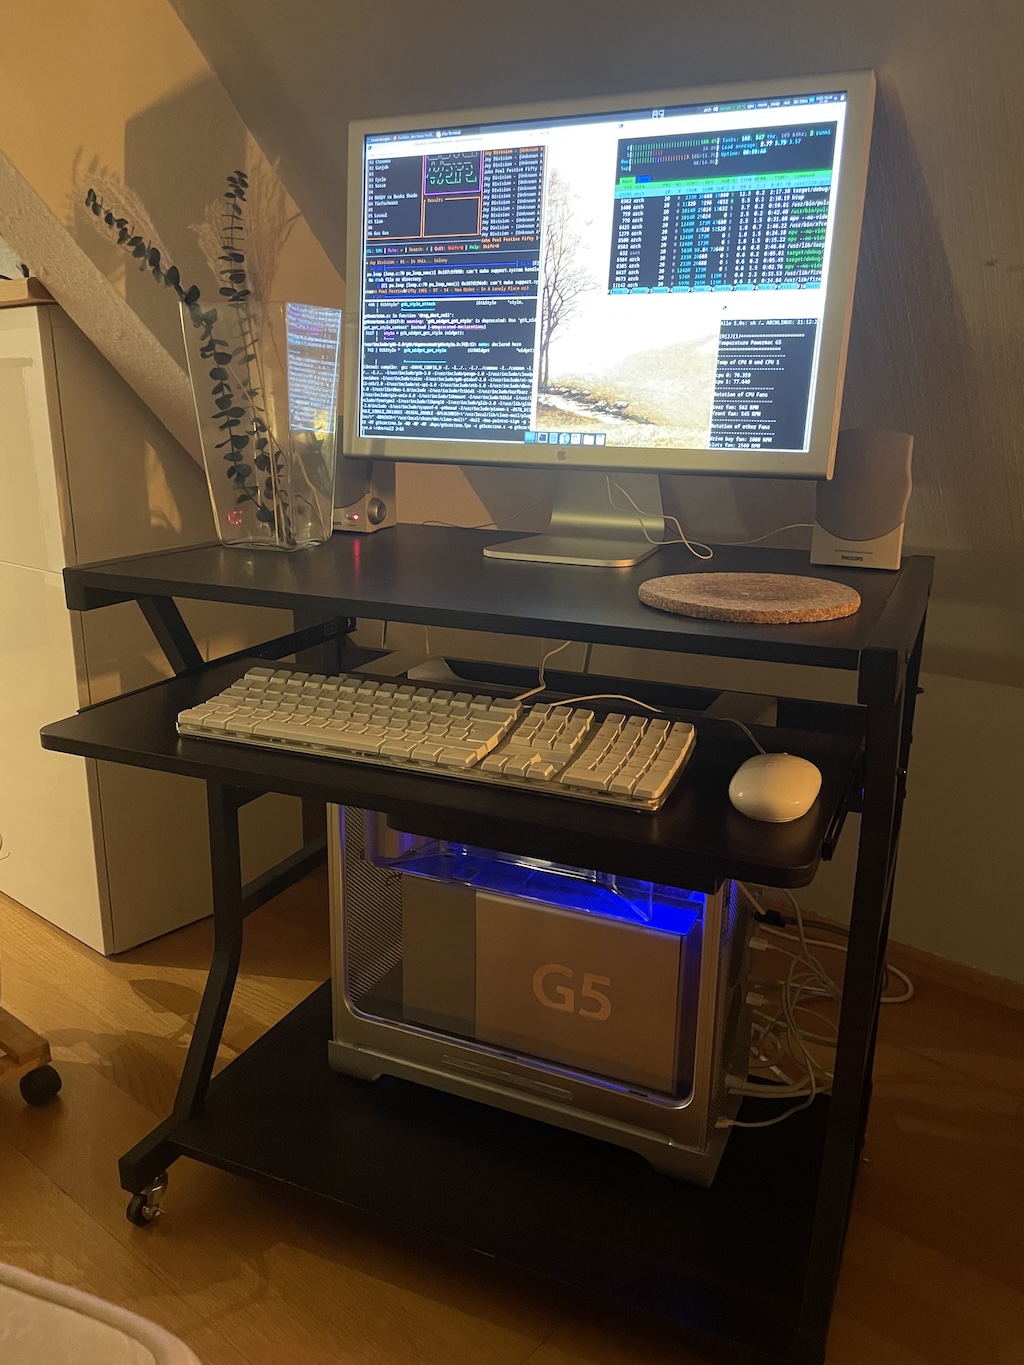 My bigfat Powermac G5 Workstation running ArchPOWER 64 while compiling Claws-Mail under XCFE and running TerminalDrome
Because of a friendly comment by Powerlinux user Matias, I am willing to try out ArchPOWER Linux for PPC (Link) again. ArchPOWER is an unofficial Port of ARCH Linux for the PowerPC Architecture: It supports: powerpc64le (>=POWER8), powerpc (>=604), powerpc64 (>=POWER4+/G5 & PS3) and espresso (WiiU SMP).
Matias wrote that Firefox is also able to run on Powermac like on T2/Linux, thanks to René Rebes Patches. I bet Firefox actually is able to run on a lot of PPC Distros outside - I am happy about that. Thank you man.
Install ArchPOWER on Powermac G5
First of all, you need to download the ISO Image of unofficial ArchPOWER Linux and burn it on your USB-Stick (Pendrive).
Create the ISO USB Pen Drive
You need to dd the iso image to your pendrive, on MacOS I do it with this command:
sudo dd if=/Volumes/2TB-NVMe_APFS/Downloads/archpower-current-powerpc64.iso of=/dev/disk8 bs=1m status=progress
While Disk8 is my Pendrive. It is clear that you can erase your whole Harddrive when making a mistake here. So be patient.
bash-5.3$ sudo dd if=/Volumes/2TB-NVMe_APFS/Downloads/archpower-current-powerpc64.iso of=/dev/disk8 bs=1m status=progress
Password:
438304768 bytes (438 MB, 418 MiB) transferred 41.067s, 11 MB/s
422+1 records in
422+1 records out
443136000 bytes transferred in 41.797580 secs (10601954 bytes/sec)
Boot Powermac G5 from USB
Connect the newly created USB-Stick to your Powermac and boot into OpenFirmware with holding ALT + CMD + O + F after the Boot Ring Tone. This will led you into Open Firmware Command Prompt.
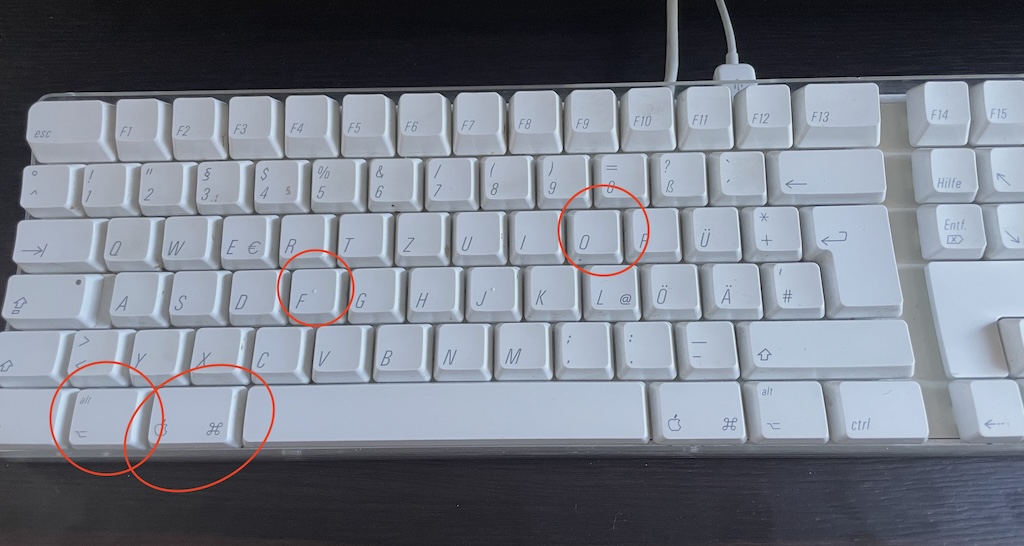 Powermac G5 Keyboard Open Firmware marked
Now we need to tell the open firmware to boot from the usb stick and what to boot on that usb stick. We do this with:
boot ud:,\boot\grub\powerpc.elf
and it should boot into grub and you select the ppc64 installer. Meanwhile on my Powermac, all the Fans start to spin at max speed, because there is no mod loaded to control the fans. Normally, when the kernel is loaded, this should stop.
After a short period of time you should see something like this on the screen of your powermac:
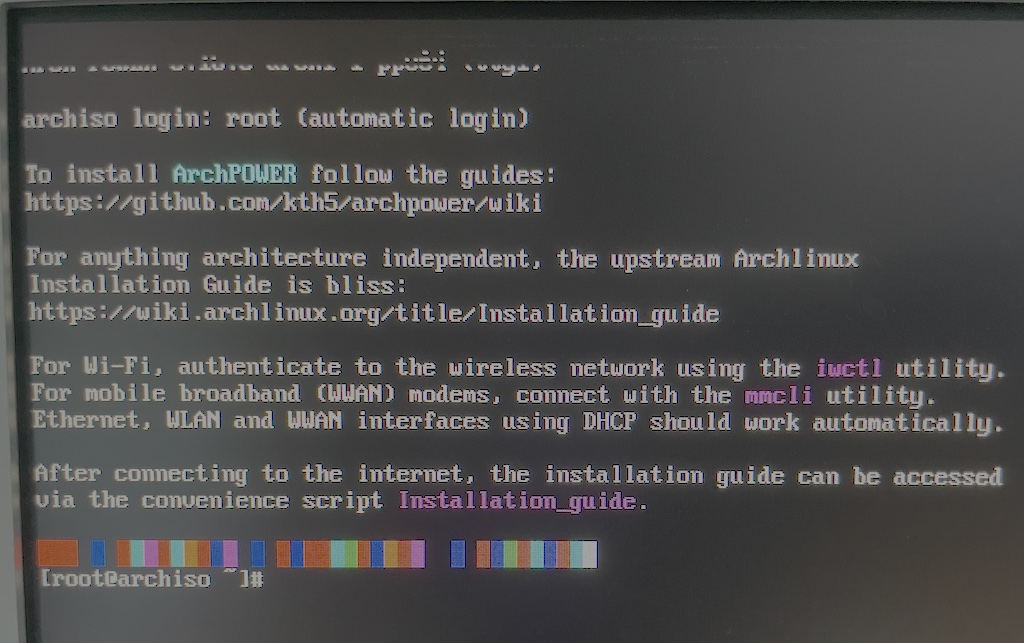 The Powermac booted into ArchPOWER ISO Image, Live
Now we are in ArchPOWER on our Powermac. Time to set the passwd of
root user to later connect with ssh. Next we need to set german keyboard layout
for easier writings :-)
loadkeys de-latin1
or if this fails:
localectl set-keymap de-latin1
The default console keymap is US. Available layouts can be listed with:
localectl list-keymaps
Now we should install sshd do connect via other pc, otherwise every step can be performed on the Powermac itself. I prefer to sit on my other Mac to look through the internet while connected via ssh terminal.
pacman -Sy openssh
and after pressing y pacman is installing the ssh server. Now we start the ssh server:
systemctl start sshd
and to obtain the ip adress we type:
ip addr
into the terminal. Just one step beyound (small hommage to Madness) we need to set the password for root user, otherwhise we have no access to the machine yet.
passwd
Now we can connect from wherever we want. Now it is time to partition and format a drive for your new to install ArchPOWER Linux. I use my NVMe-SSD and install it on Parition 5. I already have a partition from a previous installation that no longer works, so I'm continuing to use it and formatting it with the Ext4 file system. If you have to format your drives, I can't give you advice beause it is different on every computer. Read the wiki from ArchPOWER or the wiki from ArchLinux, it is complete.
I mounted the new ext4 partition for my arch on /mnt and installed a base linux with this command:
pacstrap /mnt/ base linux-ppc64 hfsutils mc htop nano
Because I use the grub on the ssd and a lot of different Linuxes on this Powermc, I do not need to install grub here in this partition and therefore I am done.
I now can reboot the powermac, boot into debian, configure grub for the new linux and after a last reboot, I boot into ArchPOWER Linux.
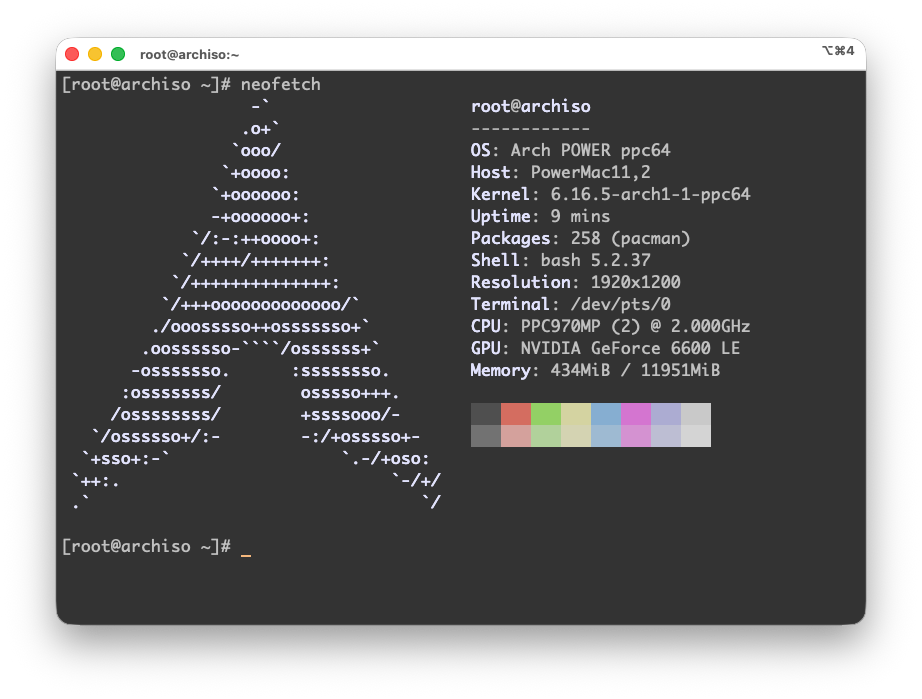 Neofetch running in Terminal on Powermac G5
Complete Arch Linux PowerPC Installation Guide
Generate fstab
genfstab -U /mnt >> /mnt/etc/fstab
Switching to the Installed System (chroot)
a) Arch-Chroot (official Installer ARCH way)
To directly interact with the new system's environment, tools, and configurations for the next steps as if you were booted into it, change root into the new system:
arch-chroot /mnt
b) normal chroot with bindmount
Once we've installed the base system, you need to chroot into it to complete the configuration:
# Mount your root partition
mount /dev/nvmen1p5 /mnt          # Replace X with your root partition number

# If you have a separate boot partition (only when needed)
mount /dev/sdaY /mnt/boot     # Replace Y with your boot partition number

# Bind the necessary system directories
mount -t proc /proc /mnt/proc
mount -t sysfs /sys /mnt/sys
mount -o bind /dev /mnt/dev
mount -t devpts /dev/pts /mnt/dev/pts

# Chroot into the installed system
chroot /mnt /bin/bash
Basic System Configuration in chroot
Set timezone and hardware clock
# Set your timezone (replace with your zone)
ln -sf /usr/share/zoneinfo/Europe/Berlin /etc/localtime
hwclock --systohc
Configure locale
# Uncomment your locales
echo "en_US.UTF-8 UTF-8" >> /etc/locale.gen
echo "de_DE.UTF-8 UTF-8" >> /etc/locale.gen
locale-gen

# Set system language
echo "LANG=de_DE.UTF-8" > /etc/locale.conf
Set keyboard layout and hostname
# Keyboard layout
echo "KEYMAP=de-latin1" > /etc/vconsole.conf

# Hostname
echo "ArchPOWERmac" > /etc/hostname
Network Setup
Install network packages
pacman -S networkmanager dhclient wireless_tools wpa_supplicant
Enable NetworkManager
systemctl enable NetworkManager
alternative: If you prefer systemd-networkd:
systemctl enable systemd-networkd systemd-resolved
User Account and Security
Set root password (already done before)
passwd
Create user account
useradd -m -G wheel -s /bin/bash your_username
passwd your_username
Install and configure sudo
pacman -S sudo
echo "%wheel ALL=(ALL) ALL" >> /etc/sudoers
Essential Additional Packages
# Development tools
pacman -S base-devel git curl wget

# SSH access
pacman -S openssh

# X Window System (for GUI later)
pacman -S xorg-server xorg-xinit xorg-xrandr

# Audio
pacman -S alsa-utils pulseaudio

# File management and monitoring
pacman -S mc htop nano
Final Steps
Exit chroot and unmount
exit
umount -R /mnt
Here you will find the second part of this tutorial, about how to install a GUI on ArchPOWER Linux with Xfce Desktop Environment.
Thats all for today. Bye and hope to see you soon.